Jenkins on Kubernetes deployed with Helm
Jenkins offers a Kubernetes Plugin in which you can launch Jenkins Jobs inside Kubernetes Pods. Let’s see how to use it. In this article, Kubernetes will be installed on Minikube with Helm.
Jenkins installation on kubernetes
Let’s start by creating our Minikube cluster
$ minikube start
Starting local Kubernetes v1.7.5 cluster...
Starting VM...
Getting VM IP address...
Moving files into cluster...
Setting up certs...
Connecting to cluster...
Setting up kubeconfig...
Starting cluster components...
Kubectl is now configured to use the cluster.

$ kubectl get nodes
NAME       STATUS    ROLES     AGE       VERSION
minikube   Ready     <none>    16s       v1.7.5
Once Minikube cluster is up and running you need to install Helm. If you are on OSX you can do brew install kubernetes-helm otherwise go to the Helm installaion page.
Then we need to init Helm
$ helm init
$HELM_HOME has been configured at /Users/mherbert/.helm.

Tiller (the Helm server-side component) has been installed into your Kubernetes Cluster.
Happy Helming!
helm init command configure helm on client side but also install tiller the server part of Helm
We can check the tiller installation in the Kubernetes cluster:
$ kubectl get pods --namespace kube-system
NAME                             READY     STATUS    RESTARTS   AGE
kube-addon-manager-minikube      1/1       Running   0          11m
kube-dns-1326421443-0x30p        3/3       Running   0          11m
kubernetes-dashboard-9q12n       1/1       Running   0          11m
tiller-deploy-1936853538-frhng   1/1       Running   0          2m
We can now install Jenkins based on Helm chart!
Let’s create a values.yaml file which will contains specific values for Jenkins.
Master:
  ServiceType: NodePort
  NodePort: 30001
  InstallPlugins:
    - kubernetes:1.1
    - workflow-aggregator:2.5
    - workflow-job:2.15
    - credentials-binding:1.13
    - git:3.6.4
    - blueocean:1.3.5
We specified that Jenkins should be exposed on the Node Port, and we set the Port to 30001. We also set the list of Jenkins Plugins.
Last part of the installation:
$ helm install -f talend-jenkins-values.yaml --name my-jenkins stable/jenkins ✔ 6655 22:05:04
NAME: my-jenkins
LAST DEPLOYED: Thu Jan 4 22:05:25 2018
NAMESPACE: default
STATUS: DEPLOYED
RESOURCES:
==> v1/Secret
NAME TYPE DATA AGE
my-jenkins-jenkins Opaque 2 0s
==> v1/ConfigMap
NAME DATA AGE
my-jenkins-jenkins 3 0s
my-jenkins-jenkins-tests 1 0s
==> v1/PersistentVolumeClaim
NAME STATUS VOLUME CAPACITY ACCESSMODES STORAGECLASS AGE
my-jenkins-jenkins Bound pvc-fc880be3-f192-11e7-88d0-08002710154f 8Gi RWO standard 0s
==> v1/Service
NAME CLUSTER-IP EXTERNAL-IP PORT(S) AGE
my-jenkins-jenkins-agent 10.0.0.235 <none> 50000/TCP 0s
my-jenkins-jenkins 10.0.0.91 <nodes> 8080:30001/TCP 0s
==> v1beta1/Deployment
NAME DESIRED CURRENT UP-TO-DATE AVAILABLE AGE
my-jenkins-jenkins 1 1 1 0 0s
NOTES:
1. Get your 'admin' user password by running:
printf $(kubectl get secret --namespace default my-jenkins-jenkins -o jsonpath="{.data.jenkins-admin-password}" | base64 --decode);echo
2. Get the Jenkins URL to visit by running these commands in the same shell:
export NODE_PORT=$(kubectl get --namespace default -o jsonpath="{.spec.ports[0].nodePort}" services my-jenkins-jenkins)
export NODE_IP=$(kubectl get nodes --namespace default -o jsonpath="{.items[0].status.addresses[0].address}")
echo http://$NODE_IP:$NODE_PORT/login
3. Login with the password from step 1 and the username: admin
For more information on running Jenkins on Kubernetes, visit:
https://cloud.google.com/solutions/jenkins-on-container-engineHelm installed some Kubernetes objects to install Jenkins (Deployment, ConfigMap, Secret, Service and PersistentVolumeClaim). Before accessing the Jenkins UI we need to get the IP.
$ kubectl get nodes --namespace default -o jsonpath="{.items[0].status.addresses[0].address}"
192.168.99.101
In our example the Ip is 192.168.99.101
We need also the admin user password. This one is stored in the Kubernetes Secret object deployed by Helm.
$ printf $(kubectl get secret --namespace default my-jenkins-jenkins -o jsonpath="{.data.jenkins-admin-password}" | base64 --decode);echo
CiSO8956as
With this password we can now access to the Web UI: http://192.168.99.101:30001

Jenkins Pipeline in a Kubernetes pod
We create a new Jenkins Job based on Pipeline definition

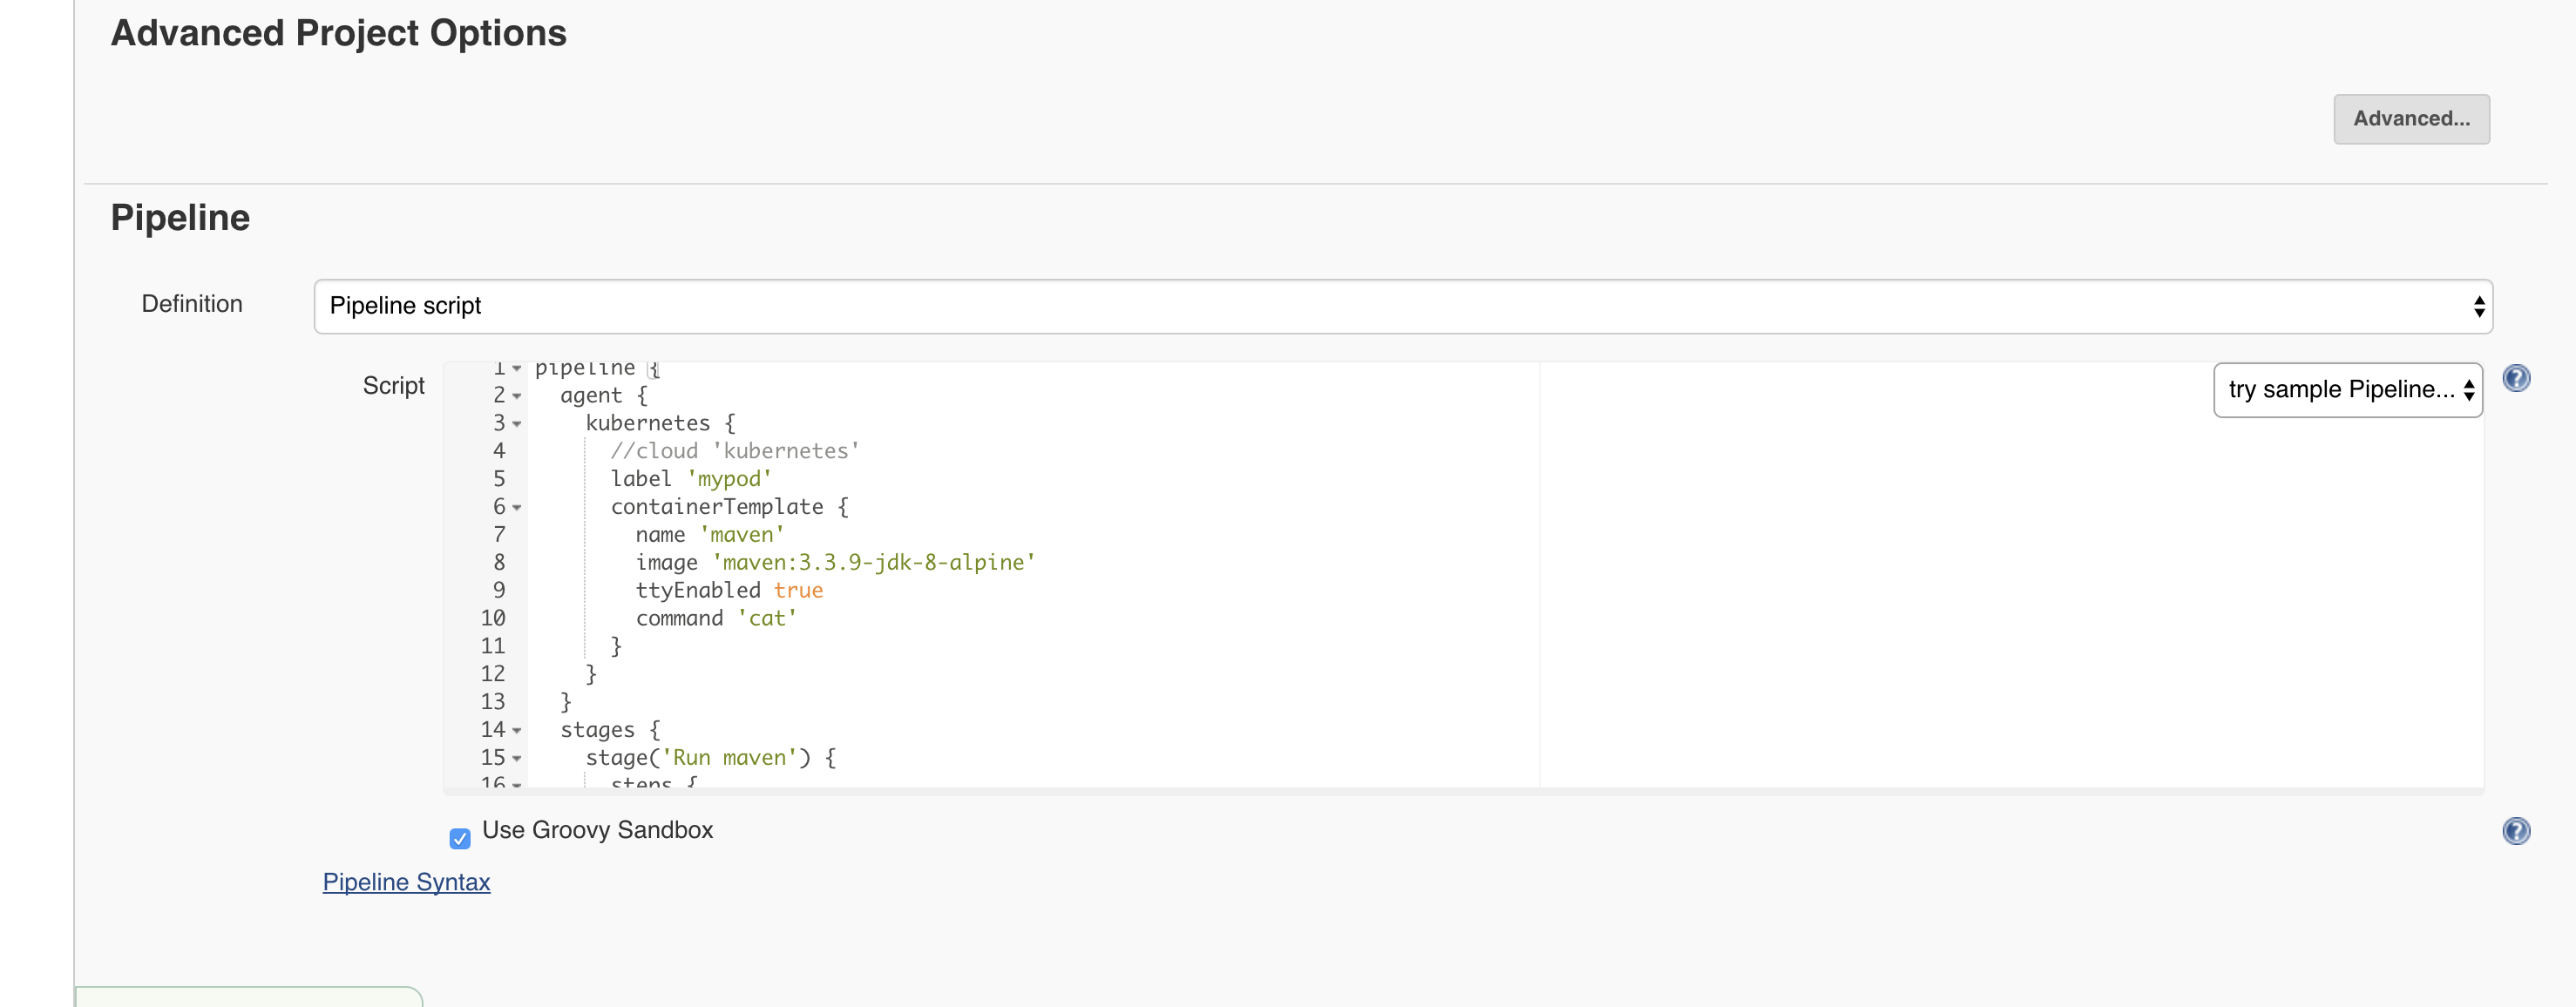
The Pipeline definition that we use here is on of the examples found in the Kubernetes Plugin Github page.
pipeline {
agent {
kubernetes {
//cloud 'kubernetes'
label 'mypod'
containerTemplate {
name 'maven'
image 'maven:3.3.9-jdk-8-alpine'
ttyEnabled true
command 'cat'
}
}
}
stages {
stage('Run maven') {
steps {
container('maven') {
sh 'mvn -version'
}
}
}
}
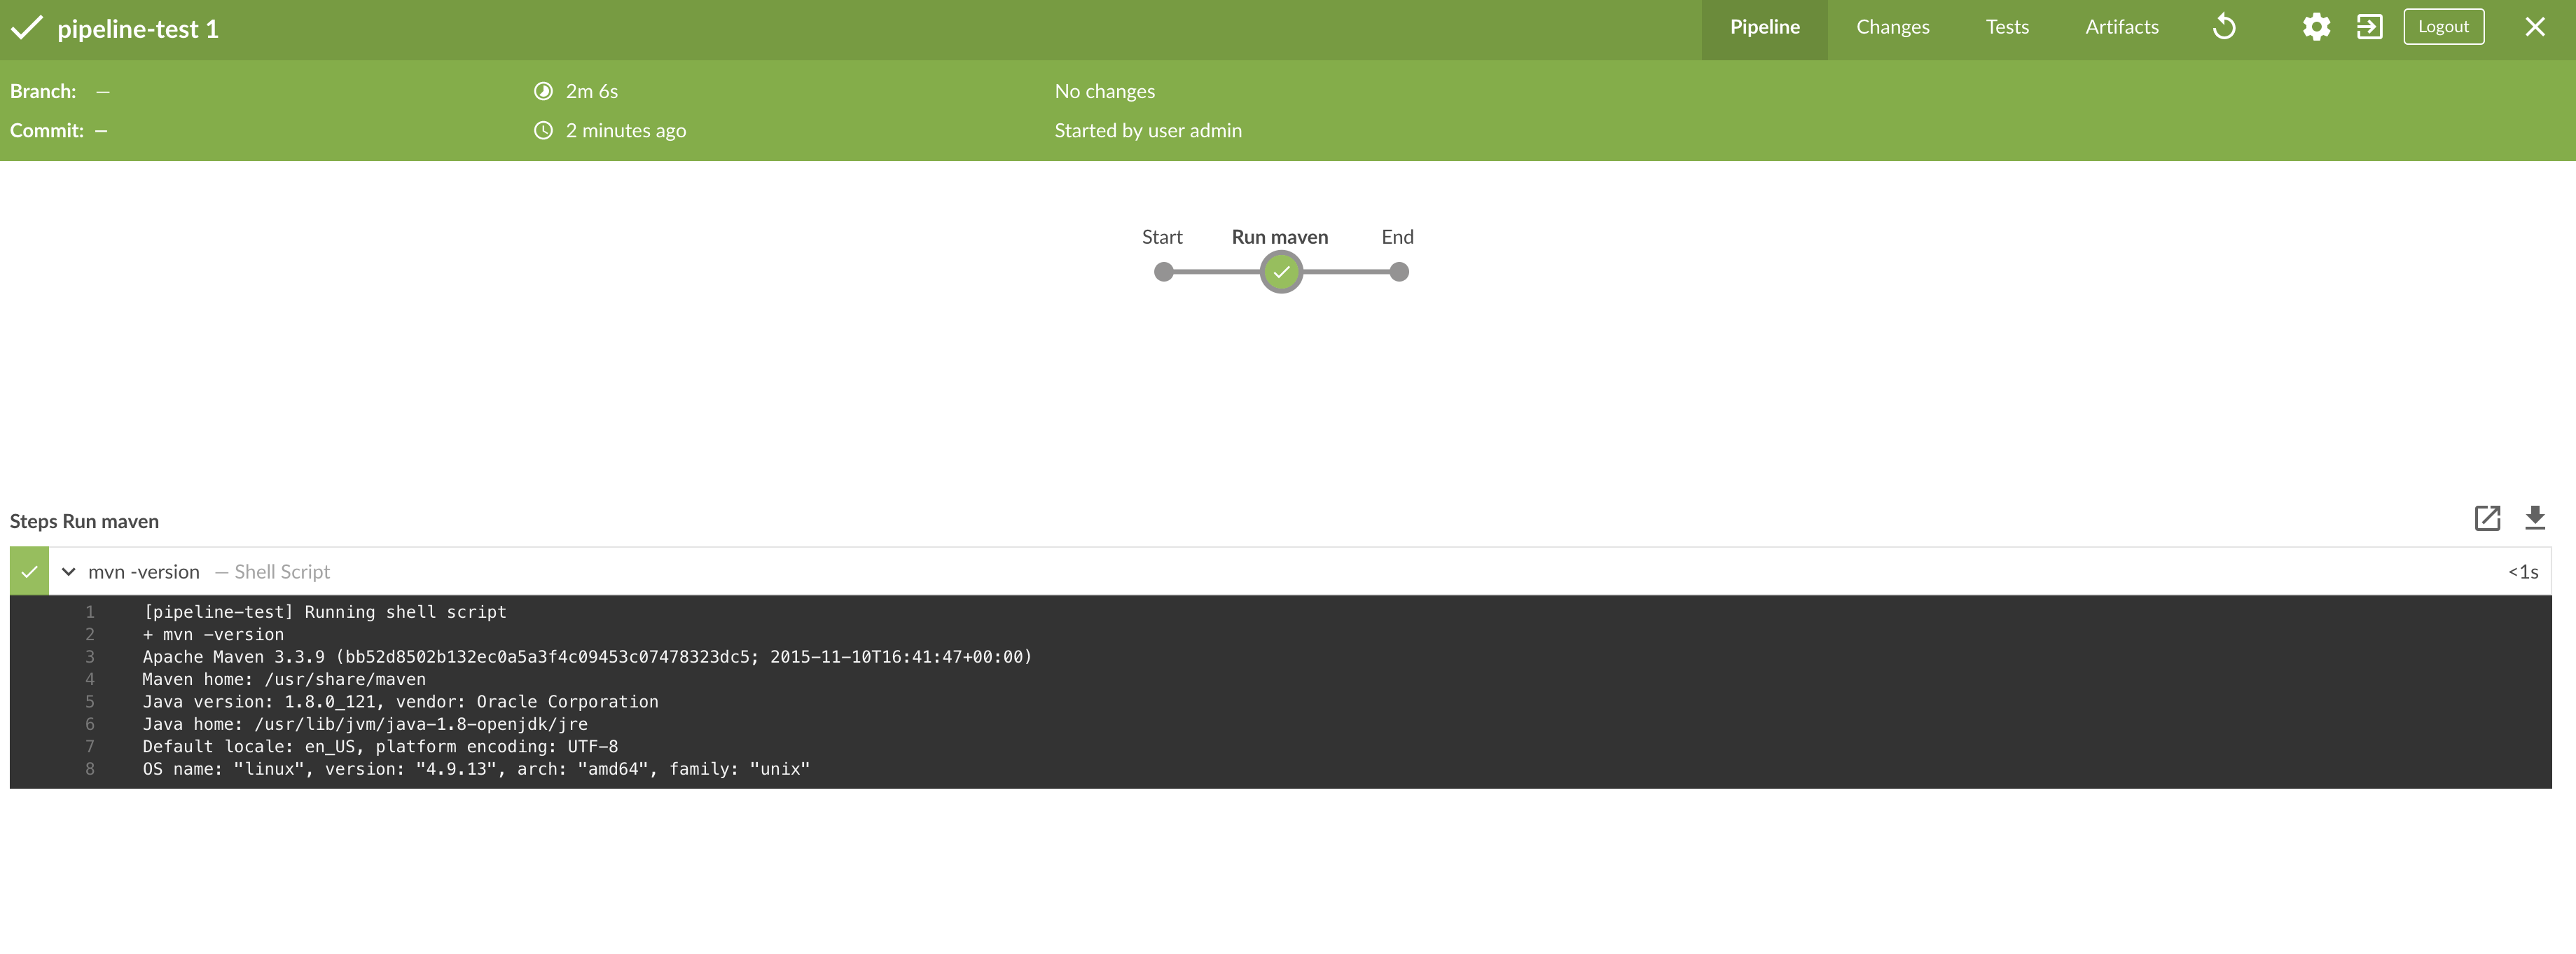
}it’s create a Kubernetes Pod based on maven Docker image. There is only one step in this Pipeline, a mvn -version in the mavencontainer.
Blue Ocean was installed as a plugin, it will give a better view of the pipeline.
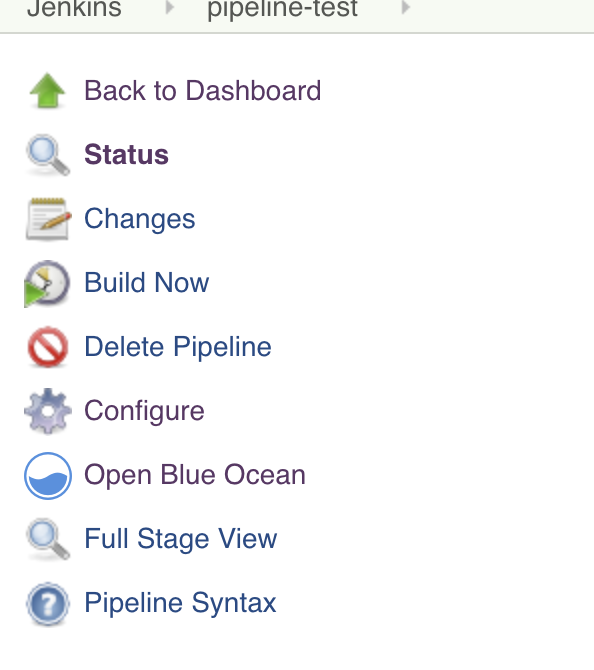
Click on Open Blue Ocean and launch the pipeline
When the Pipeline is launched we can see on Kubernetes a new Pod:
$ kubectl get pods
NAME                                  READY     STATUS    RESTARTS   AGE
my-jenkins-jenkins-1956828825-ctw0n   1/1       Running   0          25m
mypod-0q8sl-kgjfk                     2/2       Running   0          1m
mypod-0q8sl-kgjfk is the Pod of our Pipeline Execution. To each Pipeline Execution a new Pod is created. So when there is no job running, there is only the Jenkins Master Pod running.
Let’s inspect the Pod
$ kubectl describe pod mypod-0q8sl-kgjfk
Name:         mypod-0q8sl-kgjfk
Namespace:    default
Node:         minikube/192.168.99.101
Start Time:   Thu, 04 Jan 2018 22:29:34 +0100
Labels:       jenkins=slave
              jenkins/mypod=true
Annotations:  <none>
Status:       Running
IP:           172.17.0.6
Containers:
  maven:
    Container ID:  docker://2d357ec7ed496e29a95d44399ac5ae5c542f563dfe7724375b38a1ee650d1478
    Image:         maven:3.3.9-jdk-8-alpine
    Image ID:      docker-pullable://maven@sha256:3ab854089af4b40cf3f1a12c96a6c84afe07063677073451c2190cdcec30391b
    Port:          <none>
    Command:
      cat
    State:          Running
      Started:      Thu, 04 Jan 2018 22:30:22 +0100
    Ready:          True
    Restart Count:  0
    Environment:
      JENKINS_SECRET:  d095873a6947166c914e1ddf3a3f3849099616c98b22b23d8add9b532c8ad069
      JENKINS_TUNNEL:  my-jenkins-jenkins-agent:50000
      JENKINS_NAME:    mypod-0q8sl-kgjfk
      JENKINS_URL:     http://my-jenkins-jenkins:8080/
      HOME:            /home/jenkins
    Mounts:
      /home/jenkins from workspace-volume (rw)
      /var/run/secrets/kubernetes.io/serviceaccount from default-token-2jnzl (ro)
  jnlp:
    Container ID:  docker://e243f4cc630ca04b8d4eb087e5368e54aaa11d666a3dcd6d90f61b0c0d359924
    Image:         jenkins/jnlp-slave:alpine
    Image ID:      docker-pullable://jenkins/jnlp-slave@sha256:4b4c7510c111f6dfadc3da9b87996696ace826097145fd49d9eb7249464f5eda
    Port:          <none>
    Args:
      d095873a6947166c914e1ddf3a3f3849099616c98b22b23d8add9b532c8ad069
      mypod-0q8sl-kgjfk
    State:          Running
      Started:      Thu, 04 Jan 2018 22:31:11 +0100
    Ready:          True
    Restart Count:  0
    Environment:
      JENKINS_SECRET:  d095873a6947166c914e1ddf3a3f3849099616c98b22b23d8add9b532c8ad069
      JENKINS_TUNNEL:  my-jenkins-jenkins-agent:50000
      JENKINS_NAME:    mypod-0q8sl-kgjfk
      JENKINS_URL:     http://my-jenkins-jenkins:8080/
      HOME:            /home/jenkins
    Mounts:
      /home/jenkins from workspace-volume (rw)
      /var/run/secrets/kubernetes.io/serviceaccount from default-token-2jnzl (ro)
...
In the Pod there are two Containers:
jnlp: the Jenkins Slave Containermaven: our container defined in the Pipeline
Both containers share the workspace volume. In this way the workspace can be shared accross stages to be modified by the containers.
The workflow of a Pipeline Execution on Kubernetes is:
- Create Pod with Containers defined in the pipeline and
jnlp - Pull Docker images if needed
- Execute Pipeline
- Destroy Pod
Conclusion
Jenkins can be Installed on Kubernetes but can also give the Kubernetes power during the job execution.
The Kubernetes plugin offers the capability to launch Jenkins Pipeline in Kubernetes Pod. Job Workspace is shared accross containers to be modified through the Job execution.